


My husband and I decided to build ourselves a wall (like so many others) after many months of lockdown.
He did require some convincing but we had more free time than we would ever have again and we both missed our visits to the local bouldering wall so we decided to give it a go!
The wall took us about 2 weekends to construct and then another to paint and by the fourth weekend we had our holds up and we were ready to climb (I think the hardest part was waiting for the paint to dry that final week!!!)
My husband is an architect so a lot of thought went into the design; making sure the wall would be safe, strong and secure. My time was spent researching the best way to build (like when to put the T-nuts in, when to paint, what to paint with etc) and sourcing materials. We live in Northern Ireland so with Brexit we had a bit of bother getting hardware posted over from the UK Mainland. Thankfully we had a local lumber yard where we got sorted out with all of our timber for a great price.
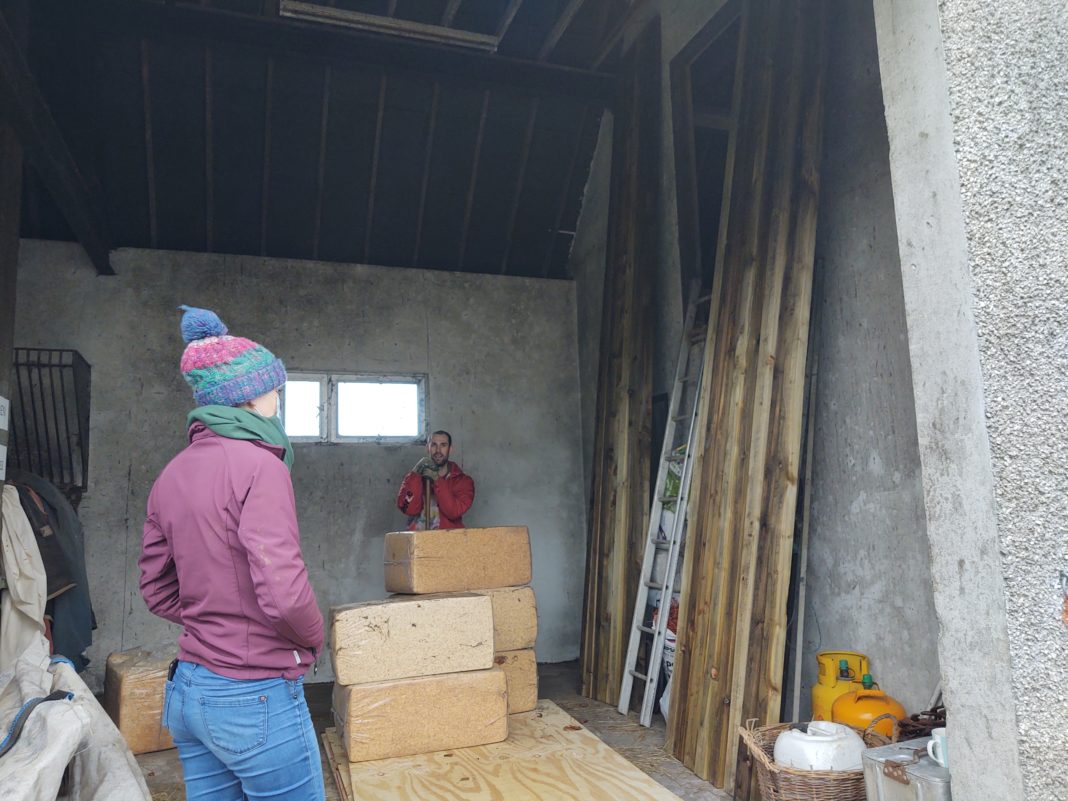
With the planning finally done we spent a day clearing the shed, purchased our timber (there was a lot!) and had a bit of a panic about what we had let ourselves in for! For the frame we got 14 x 4.8m lengths of rough sawn 2×4 and for the panels we used 5 x 8×4 sheets of 18mm “one good side” external grade plywood. It came to around £200 which was better than we had expected so we were glad to have gone to a local supplier.
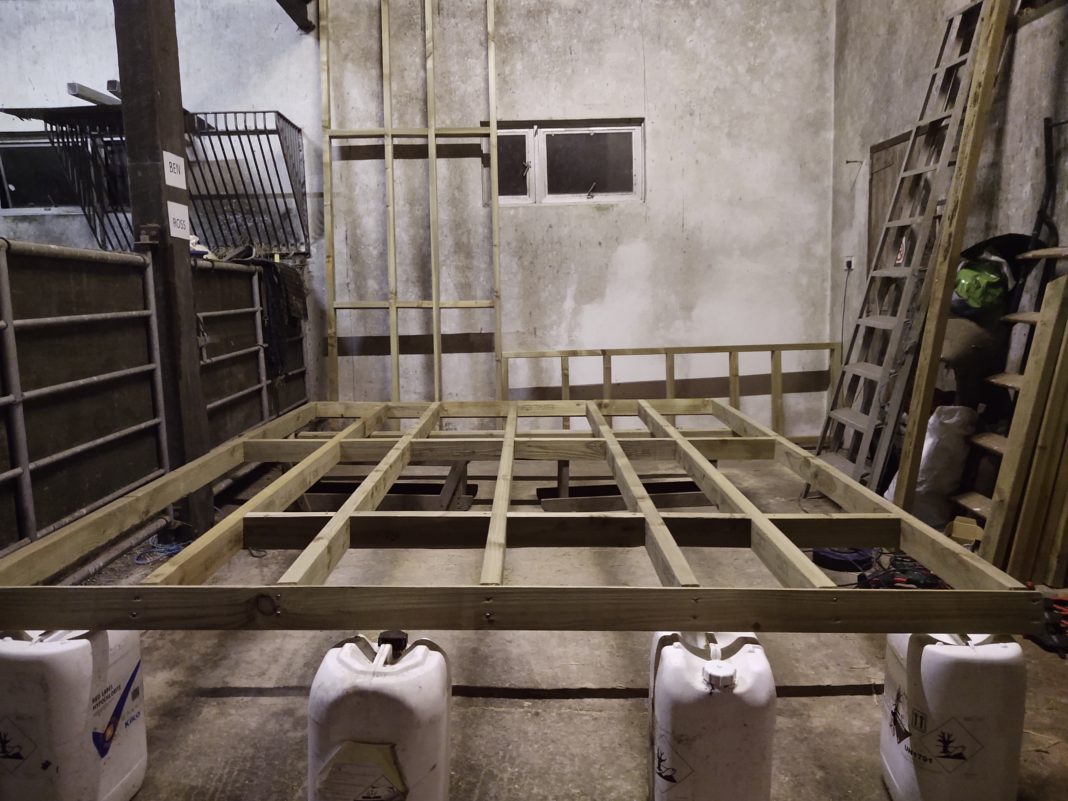
We constructed the frame on the flat in two sections – the vertical section first then the overhung section. We did a lot of checking and measuring on the ground to make sure the frame was perfectly square and we used the off-cuts from the timber lengths as batons to strengthen it all.
The frame was connected to the wall using about 25 right angles and concrete bolts, with tie backs for the overhang section.
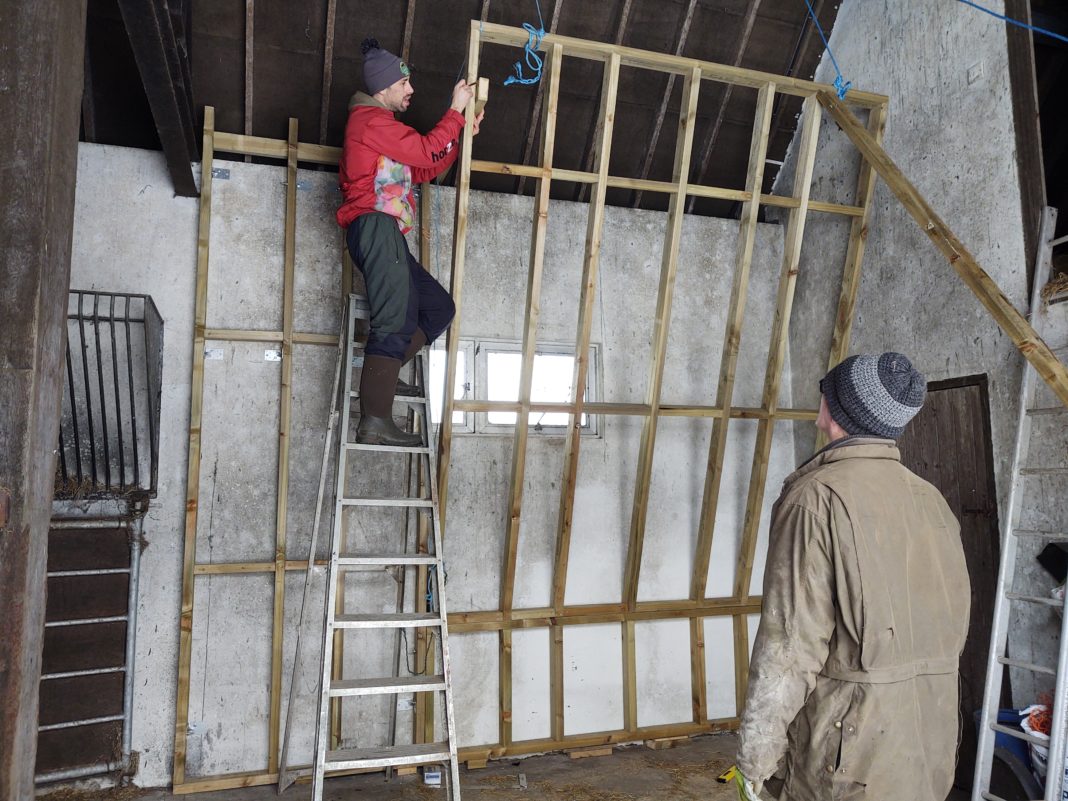
The hardest part was getting the overhang section propped up, secured and at the right angle. We had decided to go for a 20 degree angle because we aren’t super ambitious climbers and the wall is just for fun and social use. We included the vertical section so that we could invite non climbing friends over to have a go and to give a bit of variety.

I got my first “climbing fix” when I went up to secure the tie backs and it felt so good to have my feet off the ground dangling on the beams. You can see here how we bolted the tie backs to the frame and then used a right angle and concrete bolts to secure it to the top of the wall. We added another 4 tie backs half way down to add strength to the middle of the frame (there is absolutely no movement in it, no matter how heavy or dynamic the climber!!!)
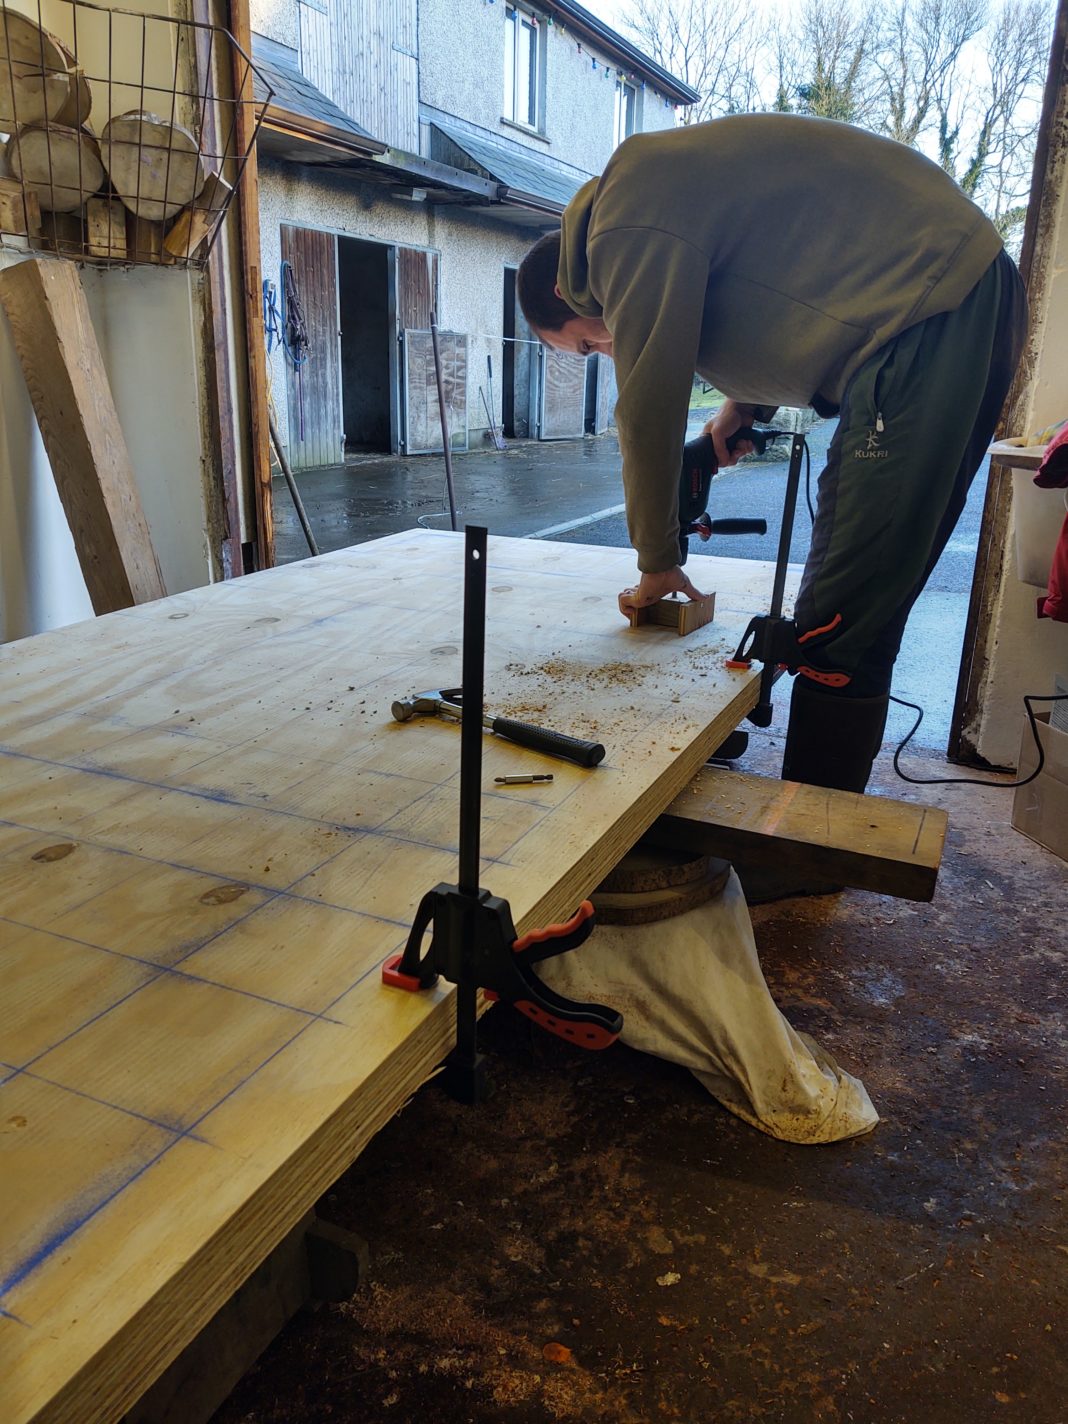
With the frame secured our next job was the plywood sheets. Before painting we drilled all of the holes. We decided on a 6 x 6 inch grid pattern, marked out with a chalk string. My husband has a router which would have ensured perfectly drilled holes but we decided it would be too slow so he instead used a normal drill with 11mm drill bit and used a block of wood with a vertical hole drilled using a piller drill as a “pilot”. We were able to clamp the plywood together and drill 3 sheets at a time.
The next job was to paint. We read a lot online about how to paint, why to paint, whether to paint. Although the general consensus seems to be that a woody is the best and cheapest option, we wanted our wall to have some colour.
We also knew we wanted to add some texture to the wall and there are so many different options on that as well but we eventually landed on the following process:
One coat of white primer on the front of the plywood very quickly followed by a coating of sand, delivered using a very fine sieve (sorry mum, for using your banking sieve…)
Once dried we added another coat of white primer, this time to all sides of the plywood to protect from any damp.
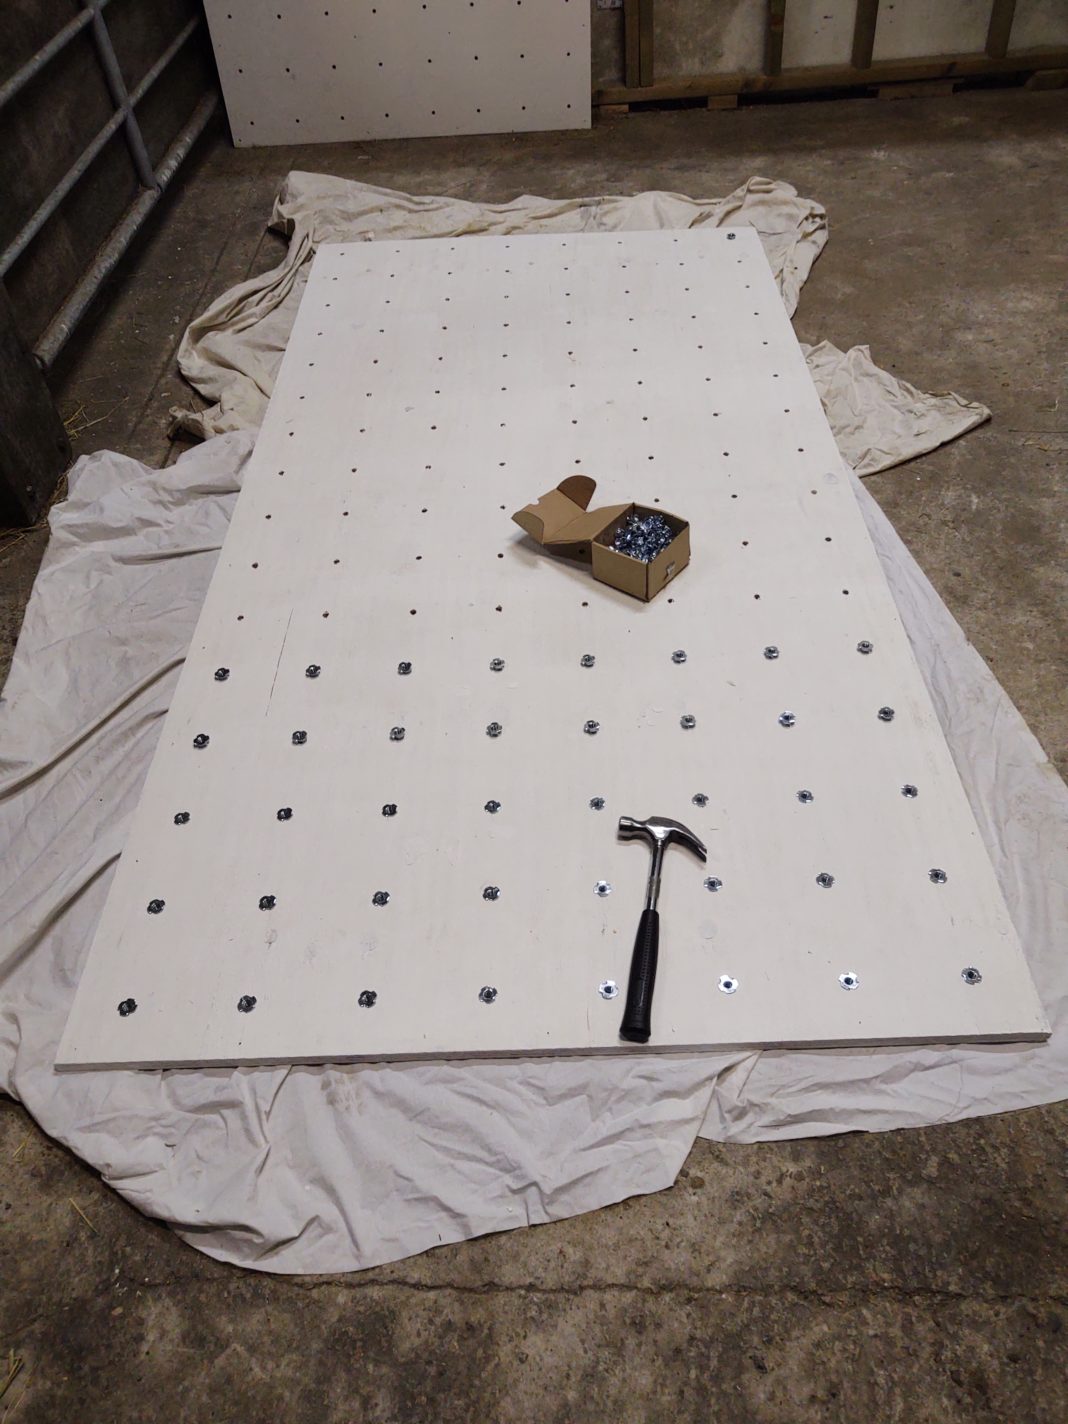
We (hubby) then had the mammoth task of hammering approximately 600 T-nuts onto the back of the plywood. We went for the pronged version rather than the screw in version as we don’t expect the wall to get too much abuse and it was the much cheaper option. We used a block of hardwood over each nut to make sure they were hammered flush with the plywood and to avoid any problems when it came to bolting holds.
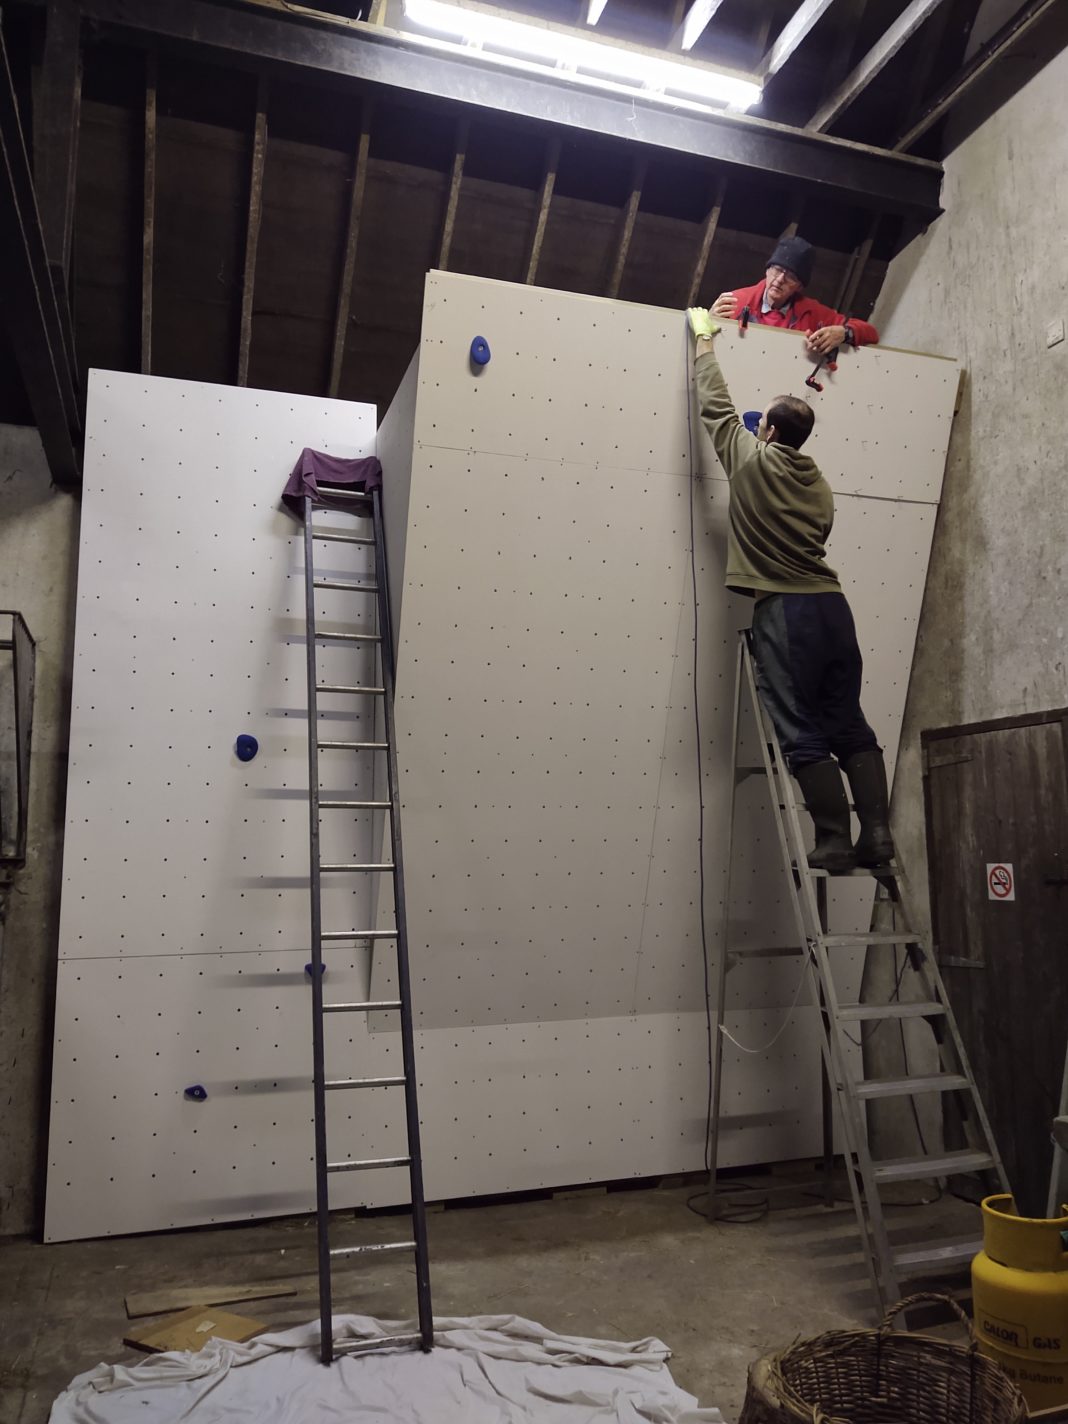
The next step was to call in some muscle (my parents) to get the sheets attached to the wall. We worked from the bottom up when attaching the sheets and we had pre-drilled pilot holes for the screws to make sure we knew we were going to catch all of the beams on the frame – my brain nearly shut down on me at this point trying to remember all of the measurements, “3.5 cm from here, 68.5 from there”, and I spent half a day measuring and remeasuring.
As an added bonus we were able to create a spectator balcony on the top of the overhang with a spare piece of plywood, seen in use above with “the muscle” leaning over!
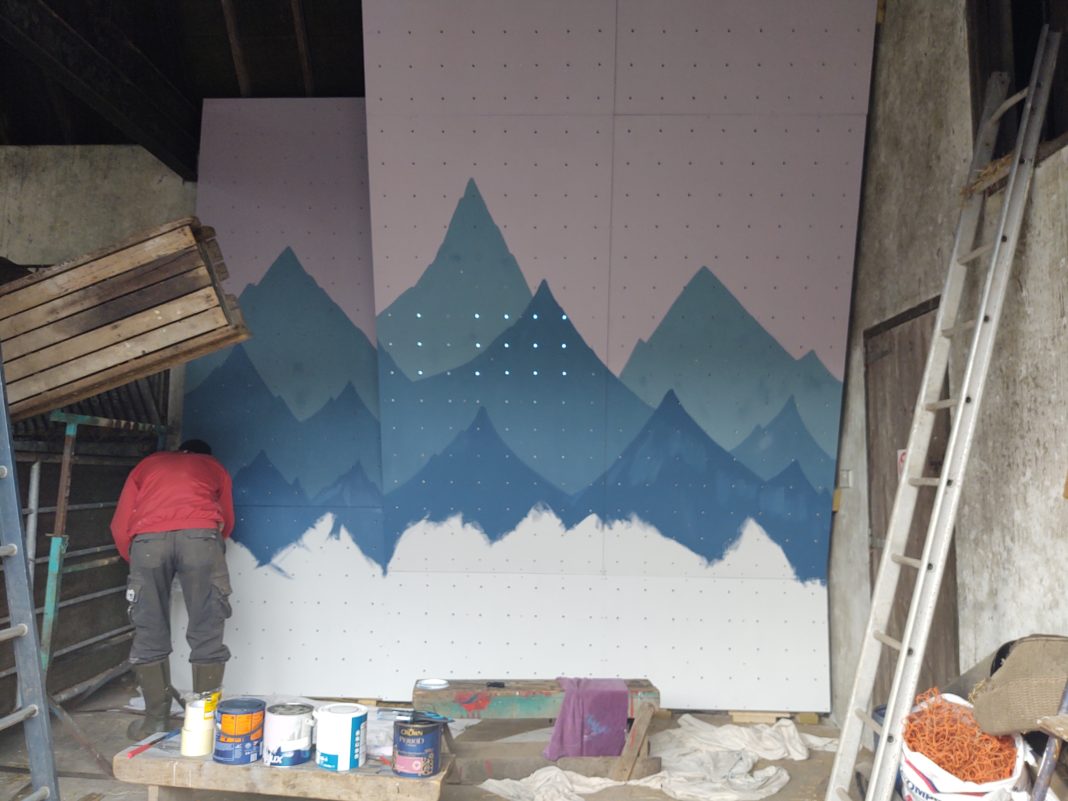
With the sheets all attached we finally got to start painting!! This took about 3 evenings with allowing the paint to dry between coats and we used lots of old pots of house wall paints to mix our own colours (just make sure you are mixing water based with water based).
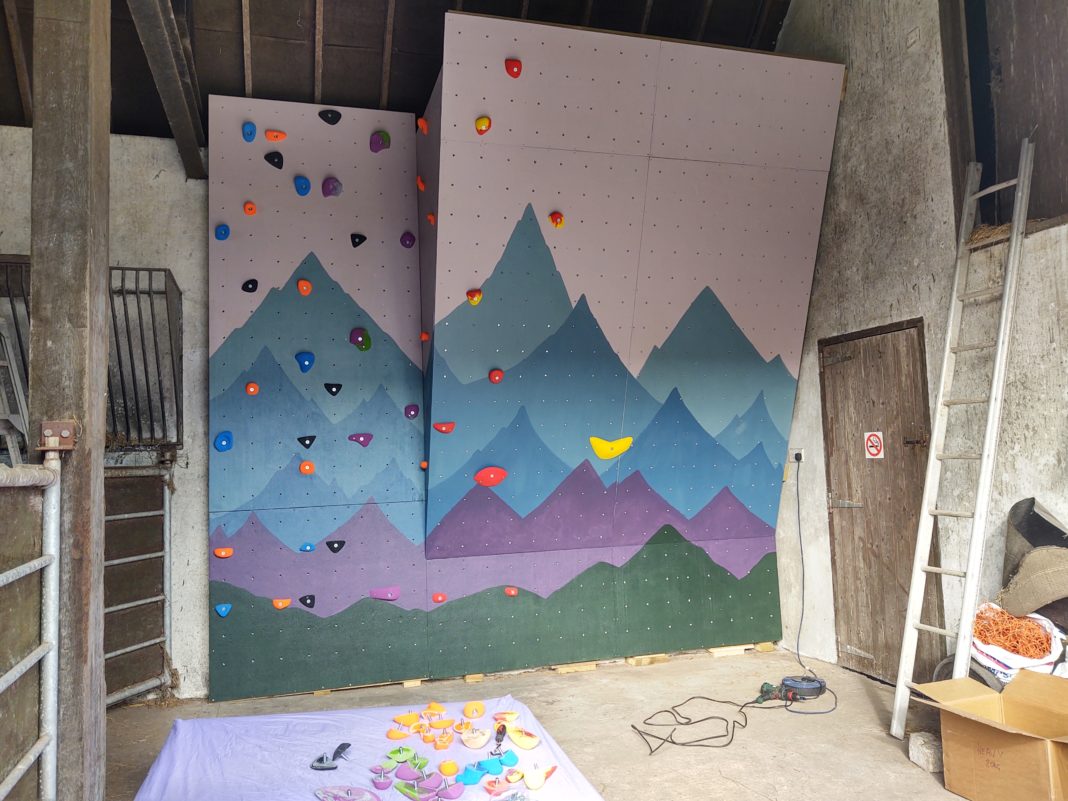
We had a lot of fun with the painting and we were really pleased with the end result. We did it all by eye and the trick was to keep it simple. We finished it off with a coat of Ronseal Outdoor Varnish to protect the paint and stop the holds from sticking.
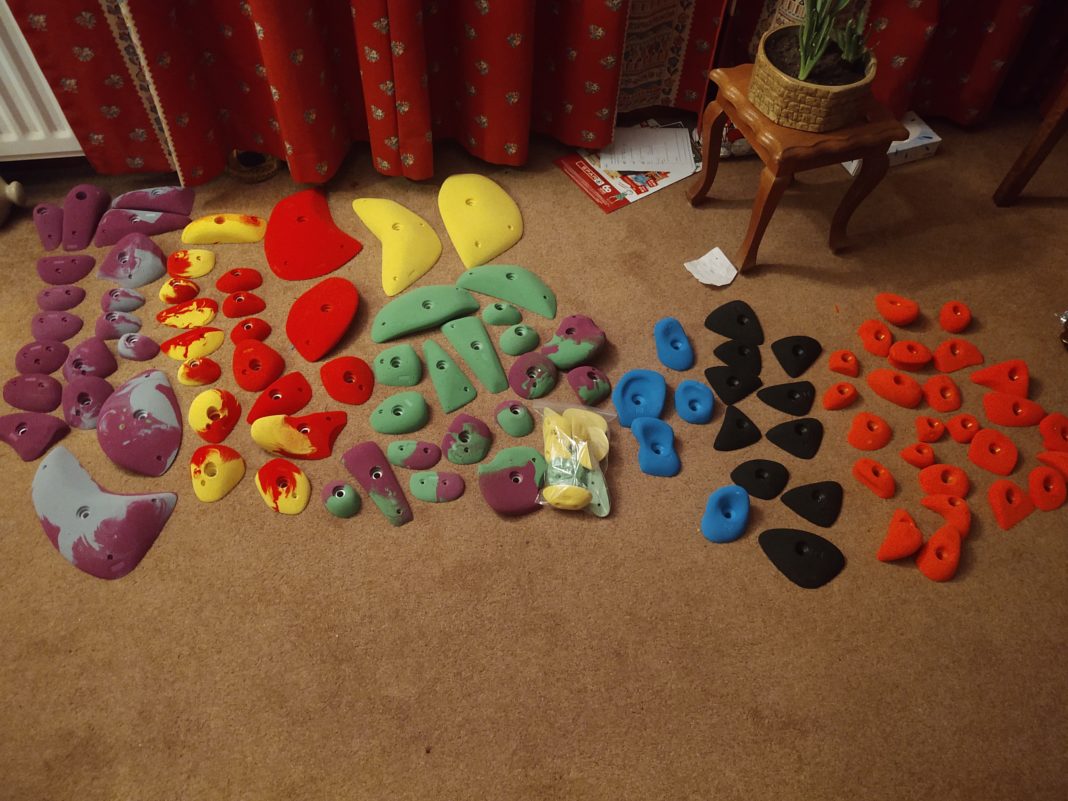
It was so exciting to finally start bolting on the holds we’d spent two weeks drooling over from our living room floor!!
We purchased a mix of 45 holds from Rockworks (the black, orange and blue) and the First Contact bundle from Alien Holds. We were really impressed with the selection from Alien Holds, there were about 65 holds with loads of variety and Neil was super helpful. We even got to pick exactly what colours we wanted and got such a fun selection! I’ve since bought a few more jugs and crimps from Neil and I’m sure I will be going back for more.
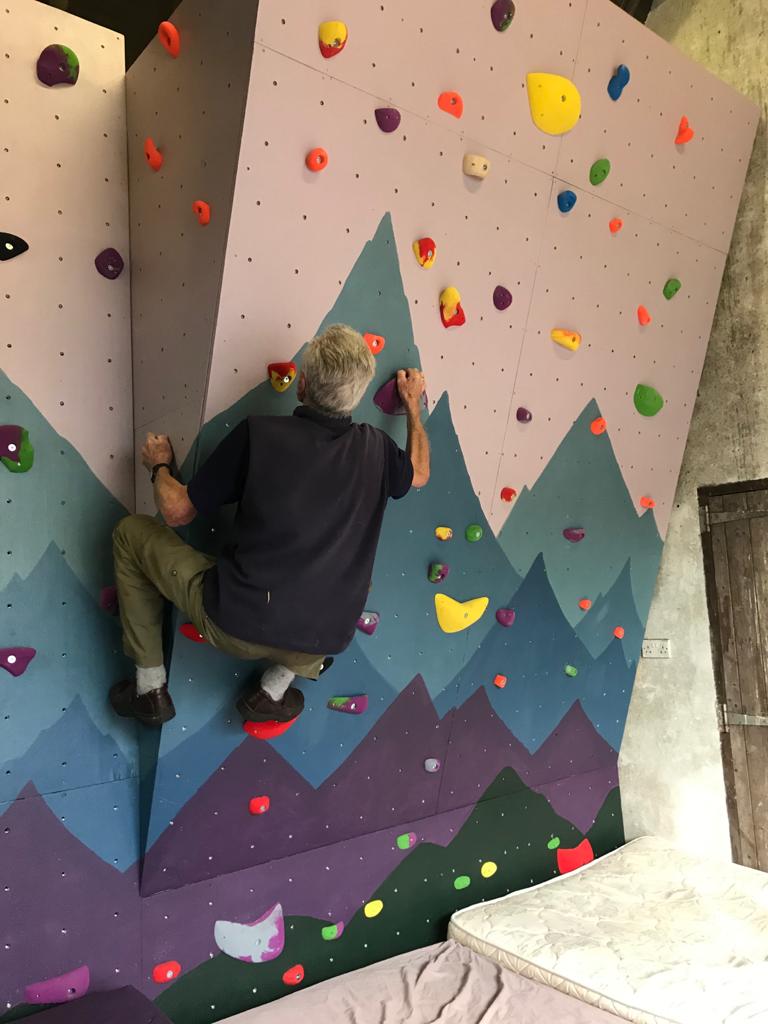
We have two layers of double mattresses below the wall, which we picked up from a local charity shop. We’ve now covered them in old fabric to smarten them up and keep them clean. They are really squashed together and the top row is off set from the bottom row so there is no risk of a heel slipping through to the concrete below.
We are so pleased with our finished wall and we’ve loved having friends and family over for a play on it – even my 84 year old Granda has been enjoying it!!


")


